This is the third post in a series reporting my notes as we worked on testing the Kon-Tiki concept at Ithaka Institute in Switzerland.
Hans-Peter Schmidt and Paul Taylor reported the outcome of the work in a YouTube video and an Article in The Biochar Journal.
In the first post I outlined why we called the kiln the Kon-Tiki. In my second post we began to learn how to operate the kiln and how it is characterized by a rolling vortex around the rim of the kiln that entrains the pyrogases into the flame zone. That prepared us for clear sailing of the Kon-Tiki in its second voyage.
The Grate Burn Floor
The main modification we made to the cone kiln for its second run was to incorporate a grate. We thought the grate, by providing a burn floor closer to the air supply at the top of the kiln, might make it easier to start the fire. It would also provide a space for the charring material to fall into, putting it further away from oxidation once carbonization was advanced enough for it to fall through the grate.
The grate was concrete reinforcing mesh with 7 mm bar on 150 mm centers, making a square mesh with 143 mm openings. The mesh was cut to a 90 cm diameter, and self-supported in the cone at a height of approximately 30 cm. The lower frustum, below the grate, has a calculated volume of 134 L, and the upper frustum, above the grate, has a volume of 827-134 L = 693 L.
We learned that this grate was far too light and that the grate is not a requirement to operate a deep cone kiln.
Operation
Place a double layer of sticks over the grate and build a pyramid or pyre of wood that comes up close to the level of the cone rim. Light it at the top.
(Without a grate the same can be accomplished by erecting a higher tower of crisscross sticks. Alternatively, the fire can be start at the top of a large ball of brambly or bushy material.)
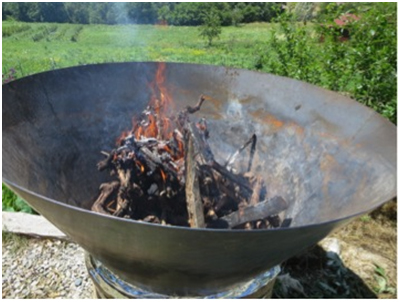
Once flaming well, add more material until the pyre flattens out and the whole bed is alight. Then add layers of material every few minutes as ash begins to show on the wood (more than just bark ash).
The fire was hot down in the cone, so even wood that was in the rain overnight dried and began to show ash fairly quickly. The presence of white ash on the outside of the biomass indicates it has dried out, reached pyrolysis temperature and has begun carbonizing (and oxidizing). At this stage the wood will continue to pyrolyze (an exothermic process) even without oxygen, as long as the material stays in a heat field sufficient to overcome heat loss by conduction, convection and radiation. Ash formation can be minimized by adding the next layer of wood early in that process so the flame front is lifted up to the next level, resulting in limited air penetration below it. This flame front then radiates heat down to keep the layer below at pyrolysis temperatures to complete the distillation of volatiles, which are consumed in the flames above.
Advantages of the Cone Shape
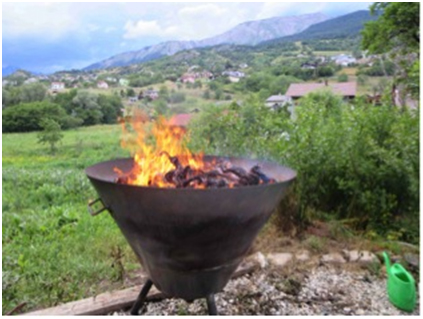
As described in post 2 and the Kon-Tiki video the circular kiln supports a toroidal vortex at the kiln rim, which brings air into the kiln to supports pyrolysis, but also sweeps the pyrolysis gases into a circular flame zone. After further work, which will be reported in the coming two posts, we believe a steep side cone may provide the strongest and most stable vortex.
Another advantage of the cone is that forming char is funneled into a decreasing area below the level it is initiated so that char builds up thicker layers more rapidly. This isolates the char layers below from air, shielding them from the oxidative presence of air penetrating below the top layer of wood, which especially can occur when using material such as our very twisty grape vine roots.
Finishing up
Before ending, as an experiment in biochar treatment, the top layer was sprayed with a mist of iron chloride to add iron.
Once the kiln is full, or the last layer desired for the day is added, let that layer burn until flames die back, resulting in a more uniform, thicker ash layer. This allows time for most volatiles to be distilled off from lower layers in the kiln, as well as the top layer, with little loss of char because the top ash/char layer is partially isolating layers below from air. The photo shows where we scraped the ashing char away to expose fresh “coals”. Some raking can be done to speed pyrogas emission and carbonizing of any remaining larger chunks, but that is a balancing act with preserving the rest of the char. When most yellow flaming has stopped its time to quench.
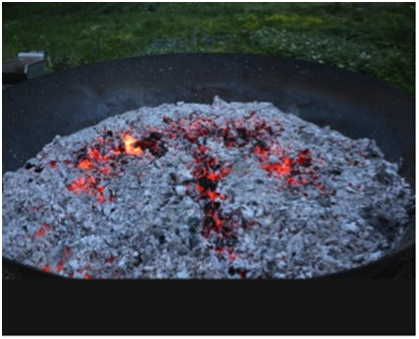
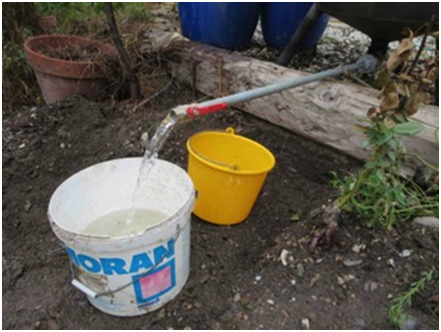
Before quenching we shoveled char into a bucket of water to do a hot extraction of remaining volatiles. Then some initial quench water was extracted into buckets via the drain valve (3 buckets full, still boiling) and also kept for comparative testing.
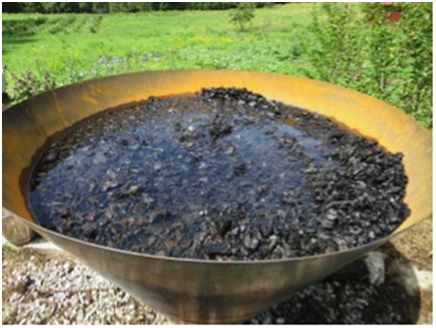
After collecting these samples, the drain valve was closed and the kiln filled with water up to the level of char. It rained about 10 mm over night, adding another about 20 L of water. In the morning the rim showed rust generated by the iron chloride. Some char was stained with iron and some pieces were floating. The water was very clear but had a soapy feel, perhaps due to a saponification process enhanced by the iron chloride. About 230 L of clear water was extracted through the drain valve.
Volumes of products
The char was 20 cm below the top rim of the cone, and therefore occupied a volume of 640 L. The char was of relatively uniform size (10 to 40 mm) all the way to the bottom. Since about 230 L of water had also occupied this space (more water may have been added, but remained absorbed and adsorbed in the char), the solid char volume would be about 400 L. Assuming a solid char density of 0.4 implies a weight of 160 Kg, and a bulk density of 160kg/640 L of 0.25 kg/L.
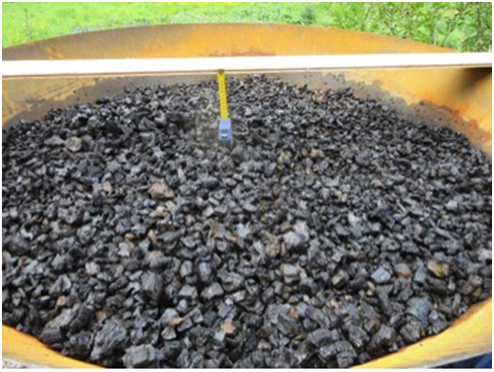
The product was easy to shovel out of the cone kiln. Our grape vine root material often had a diameter of 50mm with some bigger burls, and virtually all shrunk and broke up to well under that size. Ash was deposited on the lower kiln wall from the quenching, but when washed off the walls had no tar deposits.
 Grate or No Grate
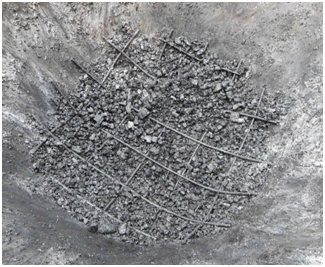
The grate of only 7mm steel bar, unsupported in the center, had collapsed into a bowl shape before sufficient char had fallen through to support it. We subsequently found a grate is not necessary if the feedstock is appropriately stacked in the kiln before lighting at the top. Nevertheless, in various circumstances a grate may be found useful (we will give an example in a future post). A sturdy grate could be built out of 25mm angle iron, V pointing up, tack welded together to from a grid (say 100mm on centers (therefore about 80×80 mm spaces). The space should be chosen to allow all char pieces to readily drop through from the size material being used.
Conclusion
The deep kiln seems advantageous for making a larger volume of char in a less oxic environment for more of the char. It operates cleanly and stably, and is able to handle moist biomass. Because the fire is open and visible there is quick feedback enabling an attentive operator to manage the fire for no visible smoke and limited ashing.
Next Posts.
From the beginning we wanted to explore, whether the benefit of a cone kiln could be obtained from a pit in the ground, and whether a square or cylindrical shape would also work.Posts 4 and 5 will report this work.

Leave A Comment