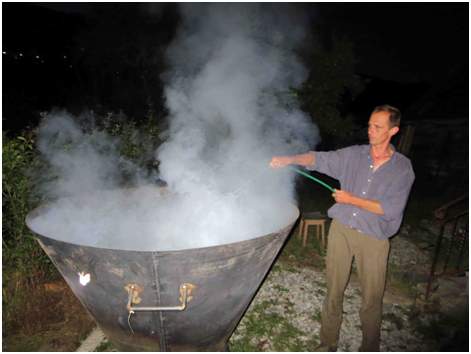
The Kon-Tiki deep cone kiln was commissioned on July 4 at Ithaka Institute in Switzerland. As the day and the next progressed, the Kon-Tiki exceeded our expectations, and seemed destined to set a new trend and alternative for biochar making.
Hans-Peter Schmidt and Paul Taylor reported the work in a YouTube video and an Article in The Biochar Journal.
In the previous post I outlined why we called the kiln the Kon-Tiki. In this post I continue my notes written late into the night, after the days run, in the guest quarters of the Ithaka Institute in Switzerland.
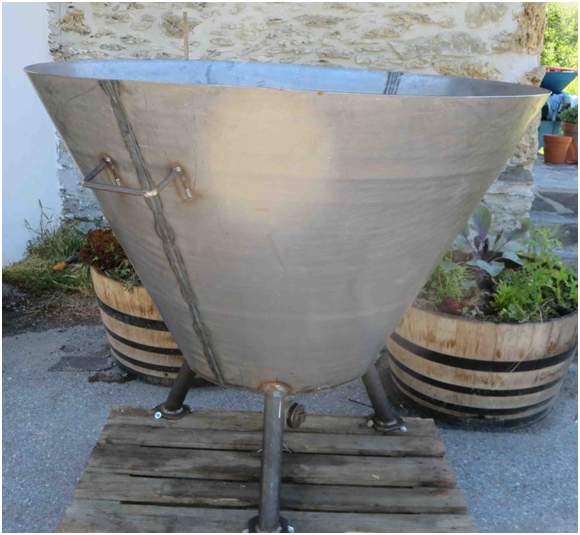
The Cone arrives
The Cone constructed for the Ithaka Institute Cone Kiln experiment was provided with 150 cm diameter at the top rim, 60 cm diameter at the bottom, 100 cm slant height cone walls, and 90 cm of vertical depth. The cone angle is 63.5 degrees. Volume of the truncated cone is 827 L. The bottom was a shallow inverse dome draining into a 90 degree bend for 70 mm OD pipe to which a drain valve can be fitted for draining smoke water after quenching, but could also be used for admitting air for igniting the fire.
We were concerned that the kiln might be too deep to admit enough air to the bottom for combustion. Indeed we found we could not sustain a fire in the bottom of the kiln. Initial ignition soon consumed all the oxygen and the fire died out before creating enough draft to pull air through the open pipe fixture at the bottom. In fact there was evidence of a downdraft through the bottom pipe. (This may make sense in light of later observations – the updraft forming above the kiln pulls air up around the outside of the kiln, which could create a low pressure zone at the bottom of the kiln.) We could not get a fire going in the bottom of the kiln using a fan to blow air into the 70 mm pipe opening or into the kiln from above.
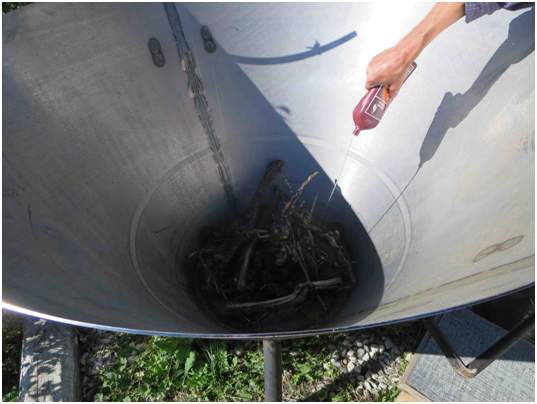
We overcome this problem by filling the kiln to within 60 cm of the top with wood, and lighting a pyramid of kindling on top of that. After the fire was established it was spread over the surface of the kiln and we plugged the pipe fitting at the bottom of the cone.
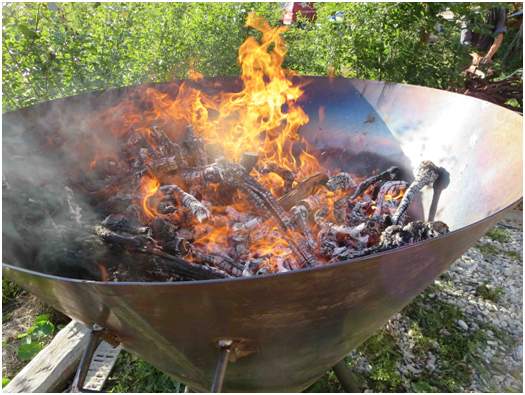
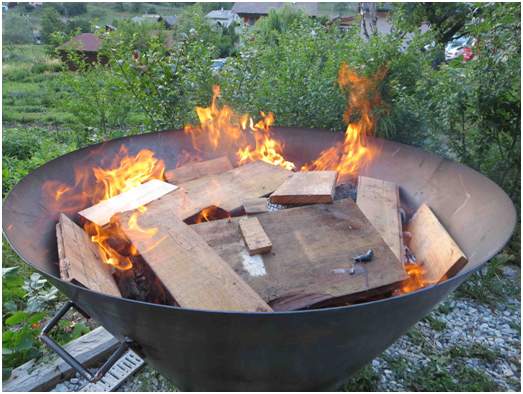
Each time white ash was apparent on the top layer of burning brands, we layered in another cover of fresh wood.
Convection Vortex
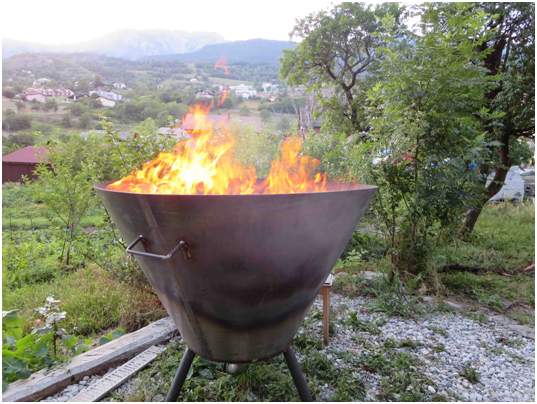
The smoke from initial pyrolysis of a fresh layer of wood gave us an opportunity to study the convection loops in the kiln. The diagram of the Japanese Cone Kiln might lead one to believe that air would convect directly into a central rising column to replace the updrafted air. Instead we could observe that at the center of the kiln fire was directed downwards into the kiln, and then radially outwards. We also observed dramatic 30 cm diameter vertical smoke rings just inside the rim of the kiln, indicating high-speed convection loops. The center of the kiln had almost no rising flames, with the flame concentrated and rising in a ring near the outer rim of the kiln. Sometimes there seemed a single convection donut in the kiln, but sometimes there could be inner donuts as well or more broken convection cells. The convection vortex is best seen in the video.
Air, preheated against the outside of the kiln, was rushing over the rim of the kiln into the low pressure created by the updraft in the flame zone. This rising air at the rim entrained and dragged air up the inside wall of the kiln. The low-pressure zone thus created inside the rim was drawing air from the center of the kiln, which in turn drafted air downwards, and in turn radially inwards from the air flowing over the rim. Thus the gases and smoke produced during pyrolysis were entrained into this vortex, and carried out into the flame zone and combusted. At the same time some of the air flowing over the rim continued upwards towards the central draft further above the kiln. This provided the oxygen needed for completion of combustion in the ring of fire, resulting in a very clean burn. The inward leaning outer envelope of the flame is seen in below picture.
Temperature by Steel Colour
During the pyrolysis, we observed the color changes due to oxide layers developed on the steel.
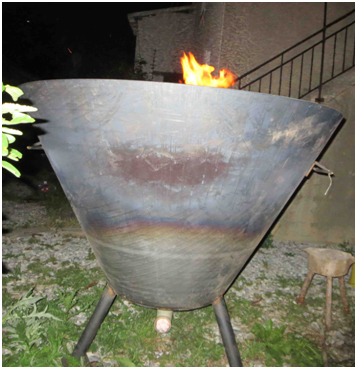
There are several factors that affect this, but they are indicative of approximate temperatures as below:
| Colour Formed | Approximate Temperature oC |
| Pale yellow | 290 |
| Straw yellow | 340 |
| Dark yellow | 370 |
| Brown | 390 |
| Purple brown | 420 |
| Dark purple | 450 |
| Blue | 540 |
| Dark blue | 600 |
If heat didn’t penetrate sufficiently towards the bottom of the kiln we planned to open the plug at the bottom to admit air to energize a pyrolysis front that would propagate downwards towards the air, as in a TLUD. However, the colors, seen in the pictures above, indicated we were getting pyrolysis temperatures, 300-600ºC, to within 10 to 40 cm of the bottom of the kiln, so we refrained from opening the bottom plug.
The color change would not progress closer than 10 cm from the bottom so we hypothesized that there might be a 10 cm boundary layer of feedstock at the bottom of the kiln that was kept below pyrolysis temperature by radiative heat loss from the outer surface and bottom of the kiln.
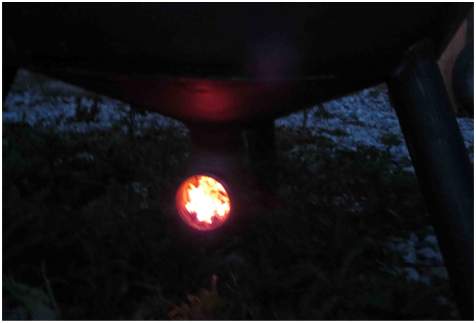
Towards the end we opened the bottom plug, and soon observed hot char dropping into the pipefitting, indicating pyrolysis was close to the bottom (see photo)
Using the Heat (well a little of it)
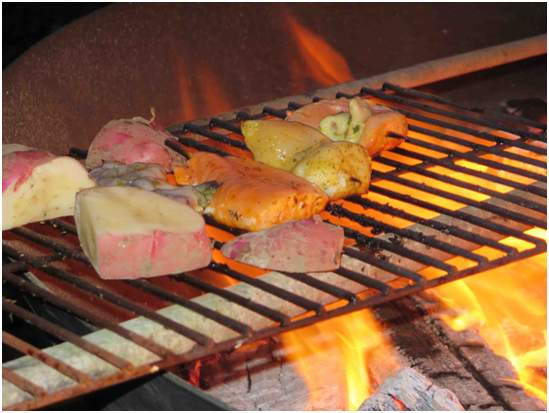
We could comfortably BBQ fish on a rack at the rim of the flaming kiln because the convection loop dragged the flame inwards, leaving just the radiant heat to grill the food.
Quenching
To limit oxidation to ash of the final top layer of wood we coated it with several shovels of moist manure. Soon after we quenched the ensuing smoke with a water spray, thus drenching the char with a hot manure percolation. We filled the cone with water to the top of the char to secure complete quenching and maximize capture of smoke water, to be drained off next day.
The Biochar
The char and water filled the cone to a depth of 74 cm giving a calculated volume of char and water in the cone of 680 L. At noon the next day we shoveled off remaining clumps of manure and some uncharred planks and brands on the top layer. Most of the remaining material was charred chunks, typically 10 – 30 mm across (a bit less than the diameter of most sticks put in), with occasional larger chunks and some uncharred chunks, mostly from large firewood or some rounds up to 200 mm diameter that were added at various depths, and even at the top, not long before quenching.
Kiln output was about 100 L of brands, 300 L of char and 300 L of smoke water.
Of Note:
Design Changes for the Next Experiment
In the next post I will report the second, and fully successful, run of the Kon-Tiki.
Thanks to the Ithaka Institute for hosting the work, and to the Biochar Journal for publishing it. Please visit these sites and support their work.

Leave A Comment